Build a DIY Dog Wheelchair That Actually Works – Step-by-Step Guide
If your pup is struggling with mobility, first—big hugs. I know how tough it is to watch your furry best friend lose the ability to run, play, or even walk like they used to. But here’s some good news: building a DIY dog wheelchair is totally possible, and it can change everything for your dog’s quality of life. With a few materials and a lot of love, you can give them back the freedom they deserve. Let’s walk (or roll!) through how to do it.
Wheelchair for Dogs: What & Why?
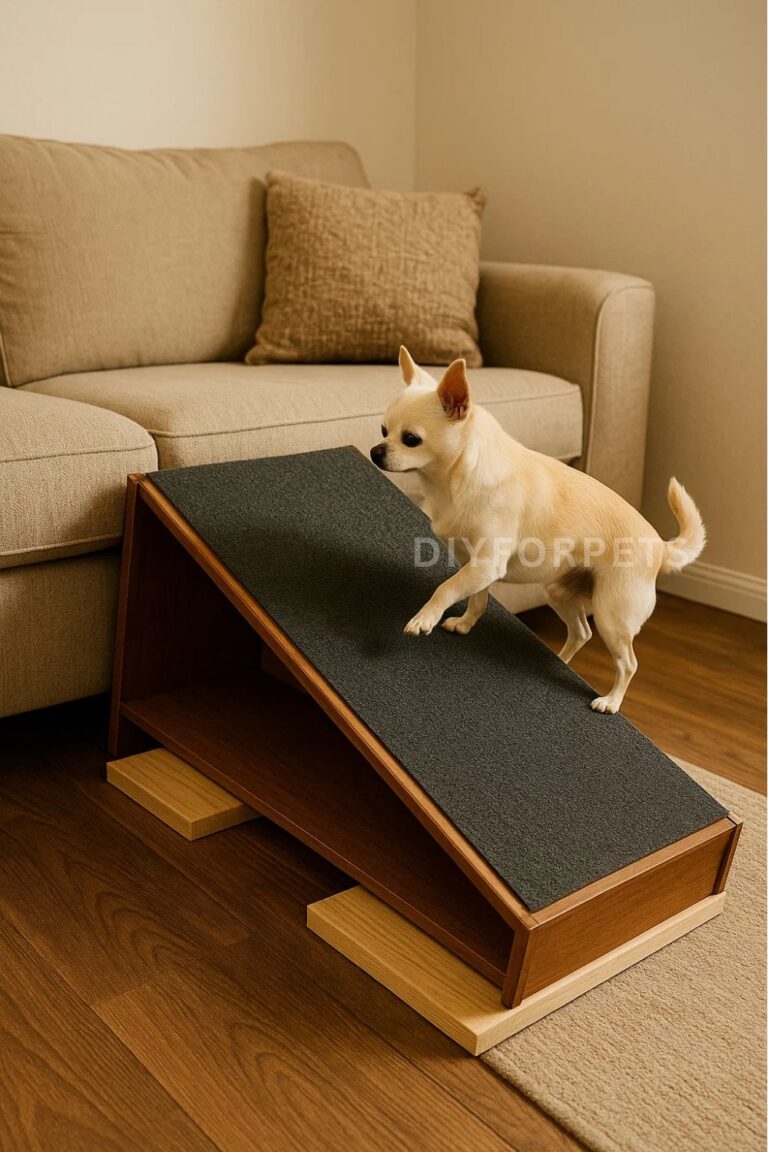
A dog wheelchair is exactly what it sounds like: a supportive frame with wheels that allows dogs with limited mobility to walk, run, and explore again. These devices are particularly helpful for dogs who have lost the use of their hind legs, whether due to injury, old age, or a neurological condition. The wheelchair essentially supports the back half of the dog’s body, allowing them to push themselves forward with their front legs while the wheels do the rest.
Why is this important? For a dog who loves to move, losing the ability to run or even walk can be incredibly frustrating. And for us as pet owners, seeing our dogs struggle is heartbreaking. A wheelchair gives them back their independence, allowing them to exercise, play, and enjoy life just like they used to. It also helps maintain muscle strength and prevents further injury from dragging their legs. And if you’re like me, knowing you helped your dog regain that joy is the best feeling in the world.
DIY Dog Wheelchair: Step-by-Step Guide
Supporting a pet with mobility challenges is easier and more affordable when you build your own DIY dog wheelchair using basic PVC pipes and wheels. The customized fit ensures your dog’s comfort and allows them to regain independence for walks, adventures, and play.
Simple adjustments and lightweight materials make the project suitable for dogs of all sizes, helping your four-legged friend live active days again. Here’s a step-by-step guide to get you started.
Materials You’ll Need
- PVC pipes (lightweight and easy to cut)
- PVC connectors (elbows and T-joints)
- Wheels (you can repurpose wheels from a small cart or buy new ones)
- Foam padding (for comfort and support)
- Harness (to attach the dog to the wheelchair)
- Screws or zip ties (for securing parts)
- Measuring tape
- A saw or pipe cutter
Instructions
- Measure Your Dog: Start by measuring the length and height of your dog from the front legs to the back of their body. This will help determine the size of the wheelchair frame.
- Cut the PVC Pipes: Using the measurements, cut the PVC pipes to the appropriate lengths for the frame. You’ll need two longer pipes for the sides of the wheelchair, as well as shorter pieces for the front and back crossbars.
- Assemble the Frame: Connect the PVC pipes using the T-joints and elbow connectors to form a rectangular frame. The front part should rest under your dog’s chest, while the back part will support the wheels.
- Attach the Wheels: Drill holes in the PVC frame to attach the wheels. You can use screws or zip ties to secure the wheels to the frame, making sure they rotate freely.
- Add Padding and Harness: Use foam padding on the areas where your dog’s body will come into contact with the wheelchair to prevent discomfort. Attach a harness to the front of the wheelchair to secure your dog in place.
- Test and Adjust: Once the wheelchair is assembled, have your dog try it out. Make adjustments as needed to ensure the fit is comfortable and the wheels are positioned properly.
This basic DIY dog wheelchair can be built for around $30 to $50, depending on the materials you use. It’s a quick, budget-friendly way to give your dog back their mobility and independence.
Easy DIY Dog Wheelchair Ideas
Let’s dive into some creative and budget-friendly DIY dog wheelchair designs. These ideas vary in complexity, but they’re all doable with basic materials and tools.
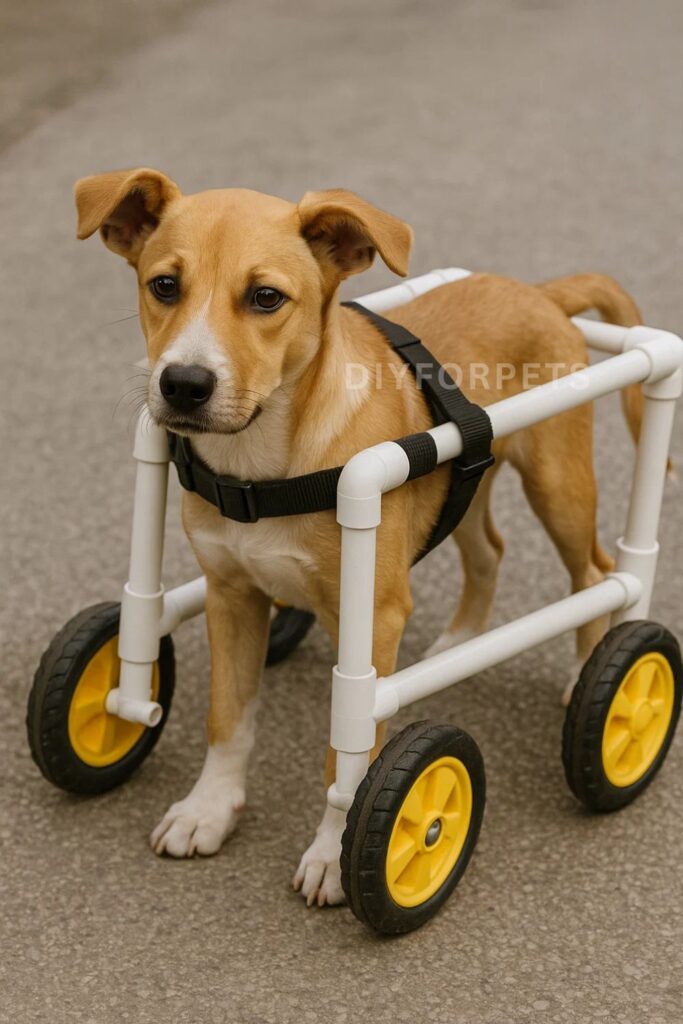
1. PVC Pipe Wheelchair
PVC pipes are an excellent choice for building a lightweight, customizable dog wheelchair. They’re affordable, easy to work with, and can be adjusted to fit dogs of all sizes. In this design, you’ll use PVC pipes for the frame and wheels from a child’s toy or cart for the back support.
Start by measuring your dog and cutting the PVC pipes to size. Assemble the frame using T-joints and elbows, and secure the wheels to the back of the frame. Add foam padding for comfort and a harness to keep your dog securely in place. This simple wheelchair costs about $30 to $40 to make, and it’s a great starting point for most dogs with hind leg weakness.
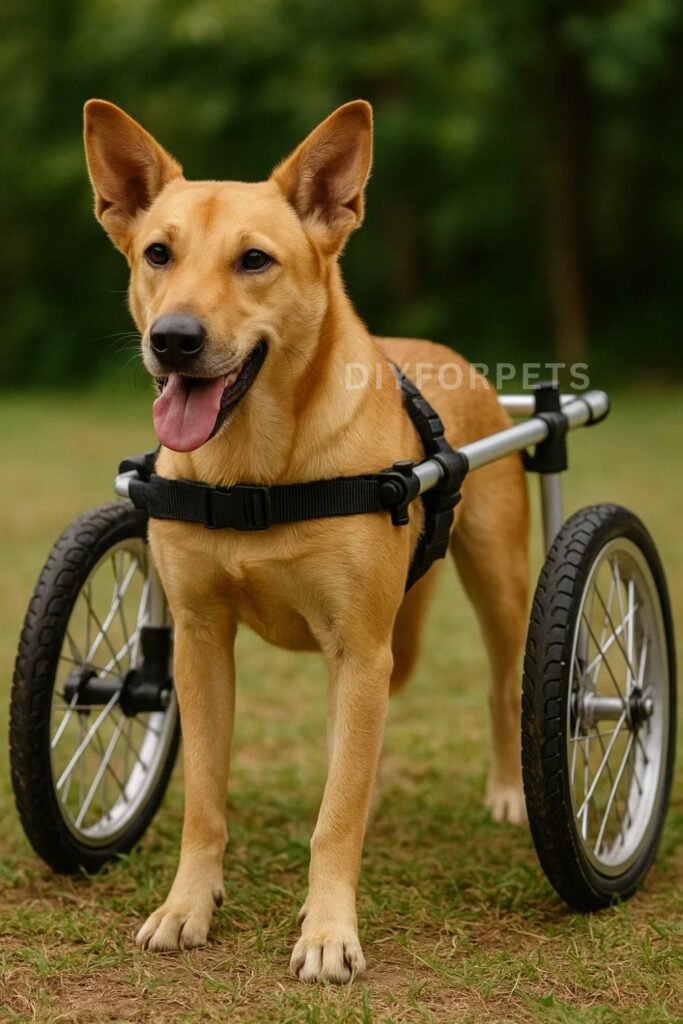
2. Bike Wheel Dog Wheelchair
If you have access to small bicycle wheels or even stroller wheels, you can use them to create a more durable and sturdy wheelchair. Bicycle wheels are larger and can handle rough terrain, making this design perfect for dogs who love to be outdoors.
To build this, follow the same steps as the PVC pipe wheelchair but use bicycle wheels for the back support. You’ll need to attach the wheels with sturdy bolts to ensure they stay in place. This design costs around $50 to $60, depending on the size of the wheels, and it’s ideal for larger or more active dogs who need extra support.
3. Aluminum Frame Wheelchair
For a more lightweight but strong option, you can use aluminum tubing instead of PVC pipes. Aluminum is durable and resistant to rust, making it a great choice for dogs who will be using the wheelchair outdoors in different weather conditions.
To build this wheelchair, follow the same steps as with the PVC design but use aluminum tubing and connectors. Aluminum is more expensive, so this project costs about $70 to $80. However, the result is a lightweight, durable wheelchair that’s perfect for long-term use.
4. Repurposed Cart Wheelchair
One of the most budget-friendly ways to build a dog wheelchair is by repurposing an old cart or stroller. You can use the wheels and frame of a small cart or stroller as the base, then customize it to fit your dog’s body.
Simply remove the cart’s basket or seat, leaving just the frame and wheels. Adjust the frame to your dog’s size by adding padding and a harness. This option is perfect if you’re looking to save on costs, as you can often find used carts or strollers for free or cheap. The total cost can be as low as $15 to $20, making it an ideal solution for small dogs or short-term use.
Dos & Don’ts in Dog Wheelchairs
Dos:
- Do measure carefully: Make sure to take accurate measurements of your dog’s body to ensure the wheelchair fits comfortably and doesn’t cause any strain.
- Do use lightweight materials: Keep the wheelchair as lightweight as possible to make it easier for your dog to move around without added stress.
- Do make adjustments: After testing the wheelchair, be prepared to make adjustments to the fit and height to ensure your dog is comfortable and can use it effectively.
Don’ts:
- Don’t use heavy or rigid materials: Avoid using materials that are too heavy, as this can make it difficult for your dog to move.
- Don’t leave your dog unattended: Always supervise your dog while they’re using the wheelchair to prevent accidents or injury.
- Don’t skip padding: Make sure to add padding in areas where the wheelchair makes contact with your dog’s body to prevent discomfort or chafing.
FAQs
1. How do I know if my dog needs a wheelchair?
Dogs with hind leg weakness, paralysis, or degenerative diseases can benefit from a wheelchair. If your dog struggles to walk or drag their back legs, it may be time to consider a wheelchair.
2. Can I build a wheelchair for a small dog?
Yes, DIY wheelchairs can be adjusted to fit dogs of all sizes. Just make sure to use lightweight materials and wheels that are appropriately sized for your dog’s weight and height.
3. How do I get my dog used to using a wheelchair?
Start by introducing the wheelchair slowly. Let your dog sniff and explore it before strapping them in. Encourage them to take small steps and reward them with treats and praise to make the experience positive.
Building a DIY dog wheelchair is a wonderful way to give your dog the freedom to move and enjoy life again. Whether you’re working with simple PVC pipes or repurposing an old cart, the joy of seeing your dog regain their mobility is well worth the effort. With a little creativity and a few basic materials, you can create a functional, comfortable wheelchair that will make a huge difference in your dog’s quality of life. So why not take on this exciting project and give your furry friend the chance to run and play again? They’ll thank you for it!