How to Make a DIY Dog Ramp That Saves Your Dog’s Joints (and Your Back)
Let’s be real—watching your dog struggle to hop onto the couch or get into the car just tugs at your heart, right? Whether your pup is tiny, senior, or just a little extra lazy (we love them anyway), a DIY dog ramp can be a total game-changer. I recently built one myself and trust me—it’s easier than you think, and your dog will thank you with endless tail wags. Let’s make your furry friend’s life a little comfier, shall we?
Ramp for Dogs: An Overview
Building a simple dog ramp at home can prevent joint stress and improve accessibility for dogs of all ages, especially those with mobility issues. You can design the ramp to fit beds, cars, or stairs, customizing width and grip surfaces for complete safety. With just basic tools and materials, you will finish the project in under an hour and see your dog confidently navigate household obstacles again
Ramps are especially helpful if your dog has had surgery, is suffering from arthritis, or simply prefers not to jump. For me, the decision to build a ramp came when one of my older dogs started showing signs of discomfort jumping onto the couch. After seeing how much the ramp helped her, I realized how useful it could be for all my pets—yes, even my adventurous rabbits!
DIY Dog Ramp: Step-by-Step Guide
Building a DIY dog ramp might sound daunting at first, but I promise it’s easier than you think. You can customize it to fit your home, your dog’s size, and your budget. Here’s a simple step-by-step guide to help you get started.
Materials You’ll Need
- Plywood or wooden planks (for the base of the ramp)
- Non-slip carpet or rubber mat (to ensure your dog has traction)
- Wooden boards for support (depending on the height of your ramp)
- Screws or nails
- A saw (to cut the wood to size)
- Measuring tape
- Drill or hammer
Instructions
- Measure the Height: Start by measuring the height of the surface your dog needs to access, whether it’s a bed, couch, or car. This will help you determine the length and angle of the ramp.
- Cut the Base: Using plywood or wooden planks, cut the base of the ramp to the desired length and width. Make sure the width is wide enough for your dog to comfortably walk up and down (around 12-18 inches for most dogs).
- Add Support: Depending on the height of your ramp, you may need to add wooden boards on either side to provide support. This will ensure the ramp doesn’t wobble when your dog uses it.
- Cover with Non-Slip Material: To prevent your dog from slipping, cover the top of the ramp with non-slip carpet or a rubber mat. You can use adhesive or small nails to secure it.
- Secure the Ramp: If your ramp is for furniture like a bed or couch, make sure it’s securely placed and doesn’t slide. You can attach it to the furniture or place rubber grips on the bottom to keep it steady.
This basic DIY ramp can be built for as little as $30 to $50, depending on the materials you already have at home. It’s a quick project that can be completed in an afternoon, and your dog will thank you for it!
Easy DIY Dog Ramp Ideas
Now, let’s dive into some creative ideas for building your own dog ramp. These designs vary in complexity, but all of them are budget-friendly and easy to make at home. Whether you need a simple indoor ramp or something more durable for outdoor use, there’s something here for every pet owner.
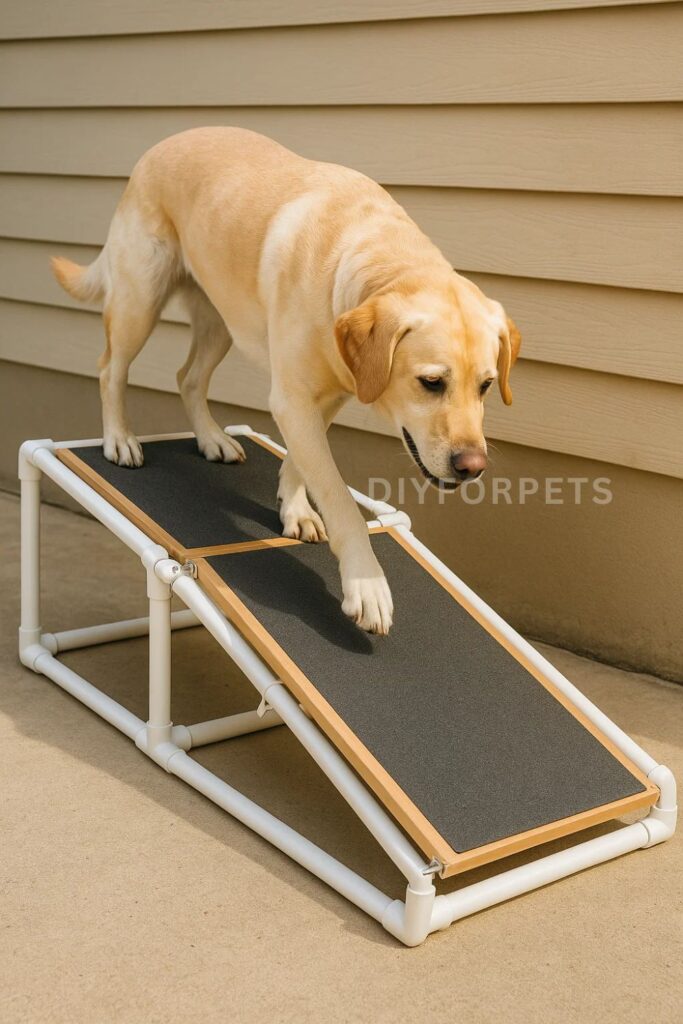
1. Foldable PVC Ramp
PVC pipes are a fantastic material for DIY projects because they’re lightweight, affordable, and easy to work with. For this ramp, you’ll use PVC pipes to create the frame and cover the base with plywood or plastic sheeting. The best part? This ramp is foldable, making it easy to store when not in use.
Start by assembling the PVC frame to your desired length and height, then attach a piece of plywood or plastic for the walking surface. Cover it with non-slip material, and you’ve got a ramp that’s both practical and portable. This project costs around $40 to $60.
2. Old Bookshelf Ramp
If you have an old bookshelf lying around, why not repurpose it into a dog ramp? This is one of the easiest and most budget-friendly ideas. Simply remove the shelves, lay the unit on its side, and cover the top with a non-slip mat. You can add wooden boards underneath for extra support if needed.
This ramp is perfect for smaller dogs and costs next to nothing if you’re upcycling an old bookshelf. It’s also a great option if you’re looking for a quick solution that doesn’t require too many tools.
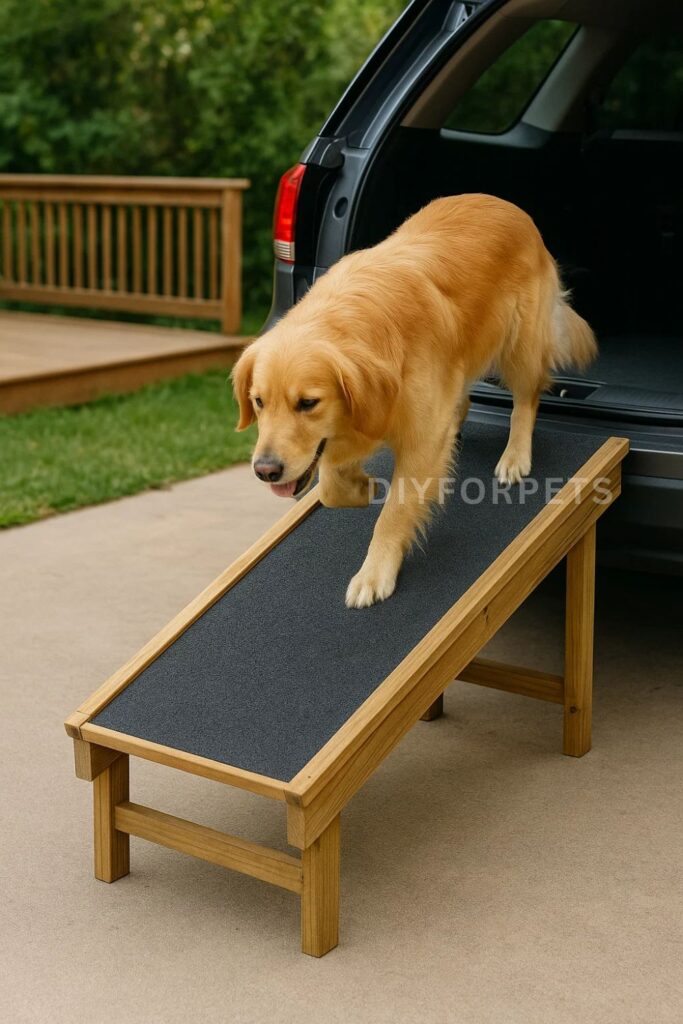
3. Outdoor Wooden Ramp
For those who need something more durable for outdoor use, a sturdy wooden ramp is a great option. Using treated wood, build a simple frame with support beams on each side. Cover the top with weather-resistant material like outdoor carpet or a rubber mat to ensure your dog has good traction even in wet conditions.
This ramp is perfect for helping your dog get in and out of the car or providing access to an outdoor deck. It costs around $50 to $80, depending on the size and materials, and can last for years with proper maintenance.
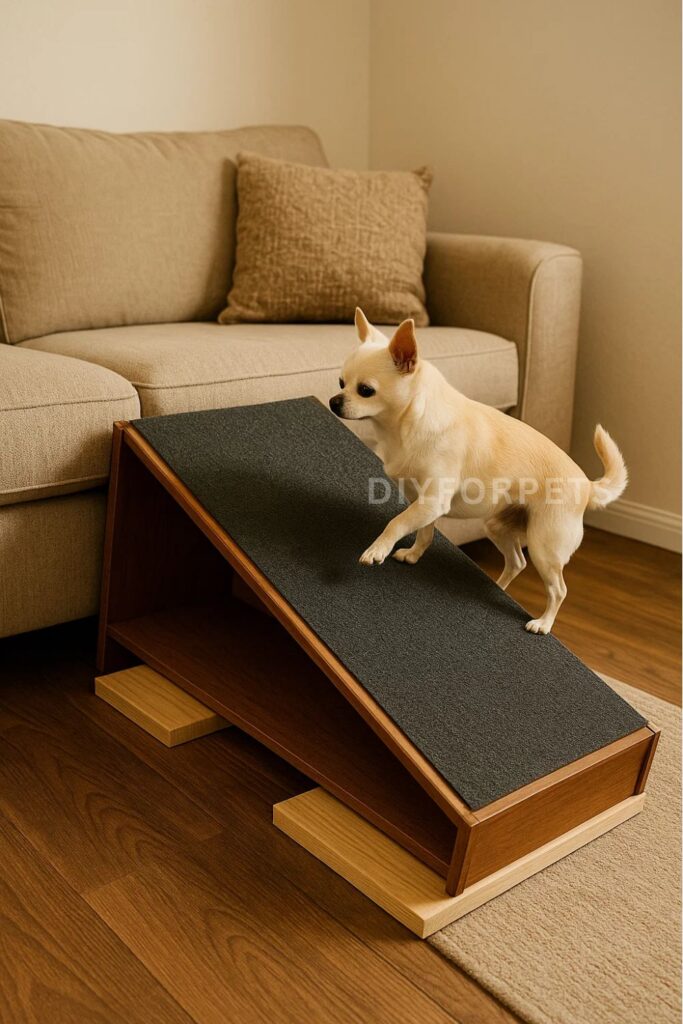
4. Adjustable Bed Ramp
If your dog needs a ramp to access the bed, an adjustable design is ideal. You can build a basic wooden ramp with hinges that allow you to change the angle. This way, you can adjust it based on your dog’s needs and the height of the furniture.
Start by building a sturdy wooden base, then attach a hinged ramp that can be raised or lowered. Cover the top with a soft carpet or mat to protect your dog’s paws. This project costs around $50 to $70 and offers great flexibility for different spaces.
5. Cardboard Box Ramp
For a super simple and temporary solution, cardboard boxes can be transformed into a ramp. Choose sturdy boxes, cut them to size, and stack them to create the desired height. Tape the boxes together securely and cover the top with a non-slip material.
While this ramp may not last forever, it’s a quick and easy fix if you need something temporary, like after surgery or for a visiting pet. It’s essentially free if you have boxes lying around and takes just a few minutes to put together.
6. Tire Ramp for Adventure-Loving Dogs
For the more adventurous pup (and owner), a tire ramp is both fun and functional. Using old tires, stack them in a pyramid shape and secure them with screws or strong adhesive. Then, place a piece of plywood or sturdy wood on top to create the ramp. Cover the surface with a rubber mat for traction.
This ramp is perfect for outdoor use and provides a fun, unique look. Plus, it’s a great way to upcycle old tires. The cost is about $40 to $60, depending on how many tires you use and whether you need to purchase additional materials.
Dos & Don’ts in DIY Dog Ramp
Dos:
- Do use non-slip material: Always make sure the surface of the ramp has good traction to prevent your dog from slipping.
- Do secure the ramp: Whether indoors or outdoors, ensure that the ramp is stable and won’t move while your dog is using it.
- Do consider your dog’s size: Build the ramp wide enough for your dog to feel comfortable walking up and down.
Don’ts:
- Don’t make the angle too steep: A steep ramp can be hard for dogs to use, especially older ones or those with joint issues. Aim for a gradual incline.
- Don’t use flimsy materials: Make sure the ramp is built with sturdy materials that can support your dog’s weight, especially for larger breeds.
- Don’t forget maintenance: If your ramp is outdoors, check it regularly for wear and tear. Replace any worn materials to ensure your dog’s safety.
FAQs
1. How do I choose the right size for my dog’s ramp?
The ramp should be wide enough for your dog to walk comfortably and long enough to create a gentle incline. Measure the height of the surface your dog needs to access and build the ramp accordingly. For most dogs, a width of 12-18 inches is sufficient.
2. Can I use a DIY ramp for a senior dog?
Absolutely! In fact, a ramp is especially beneficial for senior dogs who may struggle with stairs or jumping. Just make sure the incline is gentle and the surface provides good traction to prevent slipping.
3. How do I train my dog to use a ramp?
Start by placing the ramp on a flat surface and encouraging your dog to walk on it with treats or toys. Once your dog is comfortable, gradually raise the ramp to the desired height. Be patient and use positive reinforcement to help your dog get used to the new setup.
4. How steep should a dog ramp be for small or senior dogs?
A gentler incline is safer—aim for an angle between 18° and 25°. A longer ramp will make the slope easier to climb, especially for senior or arthritic dogs.
5. Can I use a DIY dog ramp for both indoors and outdoors?
Yes! Just make sure to weatherproof it if it’s going outside. Use treated wood or outdoor-safe materials, and always ensure it has good grip for wet paws.
Building a DIY dog ramp is one of those projects that’s not only fun and creative but also incredibly practical. Whether your dog is young or old, large or small, having a ramp can make a big difference in their comfort and mobility. With a little time, effort, and a few budget-friendly materials, you can create a ramp that suits your dog’s needs perfectly. Plus, there’s something truly satisfying about making something special for your pet with your own hands. So grab your tools, get creative, and start building a dog ramp your pup will love!