9 DIY Dog Leash Ideas To Make Quickly In 10 Minutes
There’s something really special about creating something by hand for your pets, isn’t there? As someone who shares my home with an energetic bunch of animals—dogs, cats, and even rabbits—I’ve found that making DIY projects for them brings a little extra joy into our everyday routine. And one of the most practical yet fun projects I’ve tackled recently is making DIY dog leashes.
Whether you need something unique, more durable, or just love the idea of crafting something special for your dog, making your own leash is a fantastic place to start. Plus, it’s budget-friendly and can be customized exactly how you want! So, if you’re ready to get creative with me, let’s walk through how you can make your very own dog leash at home.
DIY Dog Leash: Step by Step
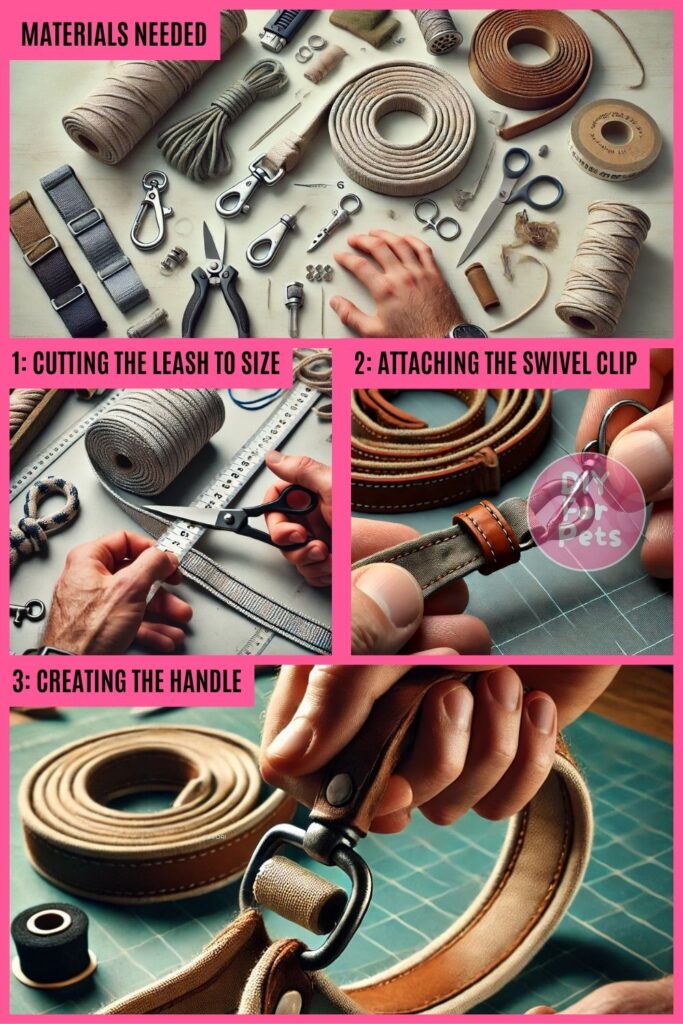
Materials Needed
To get started, let’s gather some basic materials. What you need will depend on the style of leash you choose, but here’s a general list that should cover most projects:
- Nylon webbing, cotton rope, or paracord (about 5-6 feet): $5–$10
- Swivel clip or carabiner for attaching to the collar: $3–$5
- Scissors: Already have these!
- Needle and thread or a lighter (for finishing edges): Already have these!
- Optional: fabric or leather for decorations or extra grip: $2–$5
Most of the materials are easy to find and affordable, with the total cost averaging around $10–$15 per leash, depending on what you choose.
Phase 1: Cutting the Leash to Size
The first step in making your own dog leash is deciding how long you want it to be. For most dogs, a leash that’s 5-6 feet long is ideal for walks. If you prefer a longer leash for more freedom or a shorter one for better control, adjust the length accordingly. Once you’ve chosen your material—whether it’s sturdy nylon webbing, cotton rope, or colorful paracord—cut it to the desired length.
Phase 2: Attaching the Swivel Clip
At one end of the leash, attach your swivel clip or carabiner, which will secure the leash to your dog’s collar. Fold over the material to create a loop and either sew it securely in place or use a lighter to carefully melt and seal the edges of nylon webbing. If you’re using rope, you can tie a strong knot, like a bowline, and reinforce it with extra stitching if necessary.
Phase 3: Creating the Handle
At the opposite end of the leash, fold the material over to create a loop large enough for your hand. This will be the handle. Just like with the clip, sew or tie the loop securely in place. If you’re using fabric or leather for decoration or added grip, this is the perfect time to attach it around the handle area.
8 Easy DIY Dog Leash Ideas
Ready to add some personality to your dog’s leash? Here are eight creative DIY leash ideas that are not only functional but also fun to make. Each of these ideas can be customized based on your dog’s size, your personal style, and how you plan to use the leash.
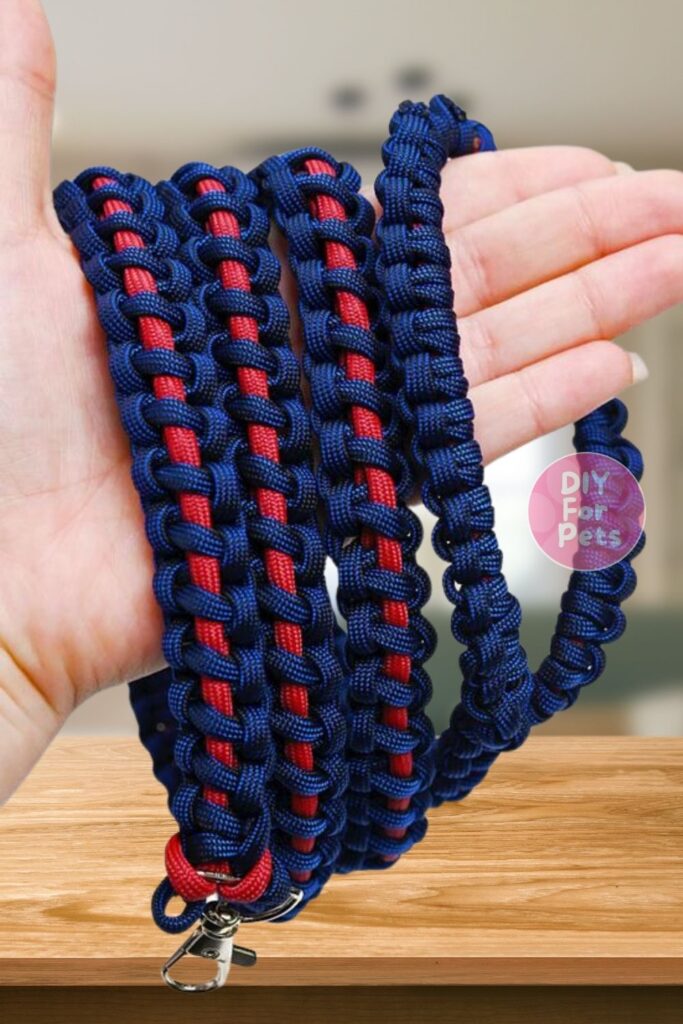
1. Paracord Braided Leash
For those who want a durable yet stylish leash, a paracord braided leash is an excellent choice. Paracord comes in a variety of colors, and you can braid it using different patterns for a sturdy, long-lasting leash. The four-strand or cobra braid is a popular option because it’s simple but strong. Just weave the paracord tightly together, and you’ll have a leash that’s not only practical but eye-catching.
This leash costs about $7–$10, depending on the amount of paracord you use, and it’s great for medium to large dogs who need a tougher leash.
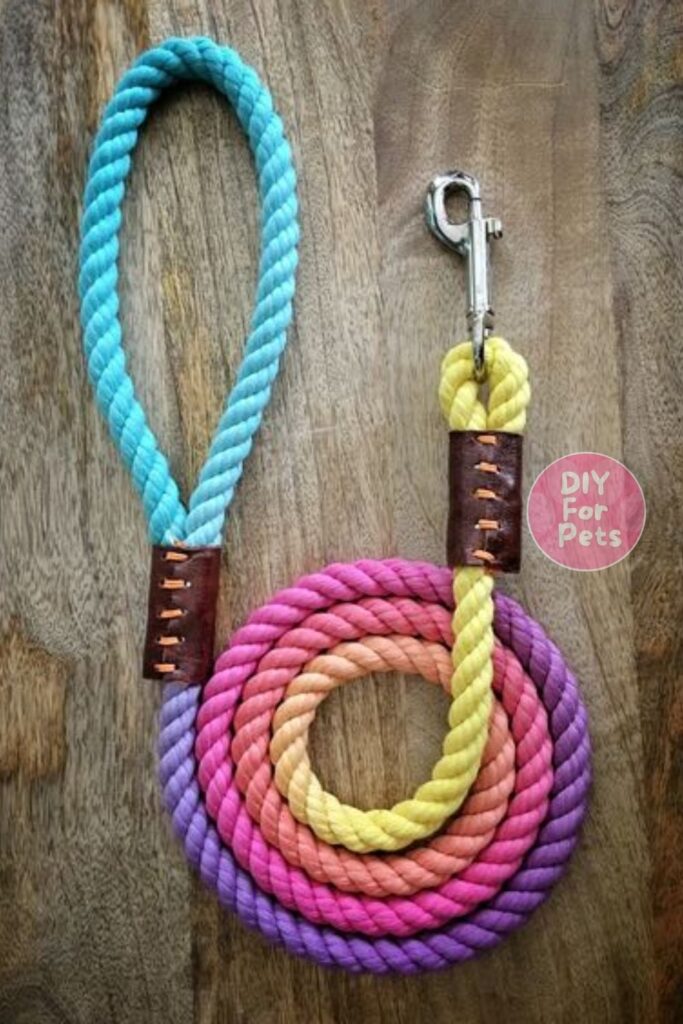
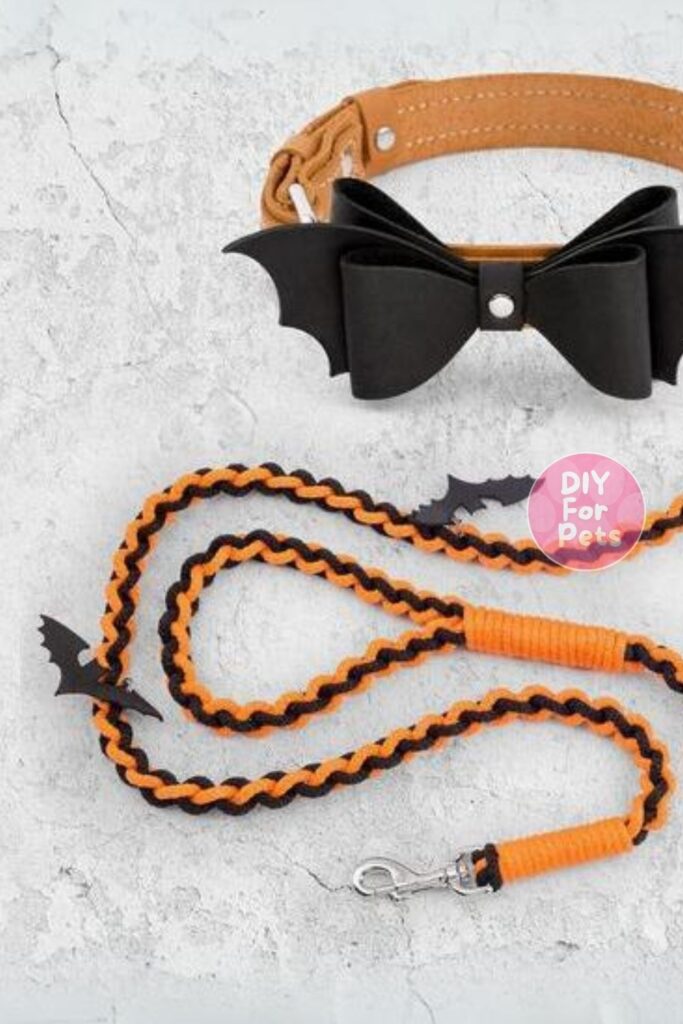
2. Rope Leash with Knot Detailing
For a more rustic or nautical vibe, you can create a rope leash with decorative knot details. Use a thick cotton rope (about 1/2 inch thick) and tie figure-eight or square knots at regular intervals down the leash for extra style and grip. Attach a sturdy carabiner or clip at one end and create a handle loop at the other.
This leash is perfect for those who like a little extra grip and durability, costing around $10. It’s also a great option for dogs who love outdoor adventures, like hiking or trips to the beach.
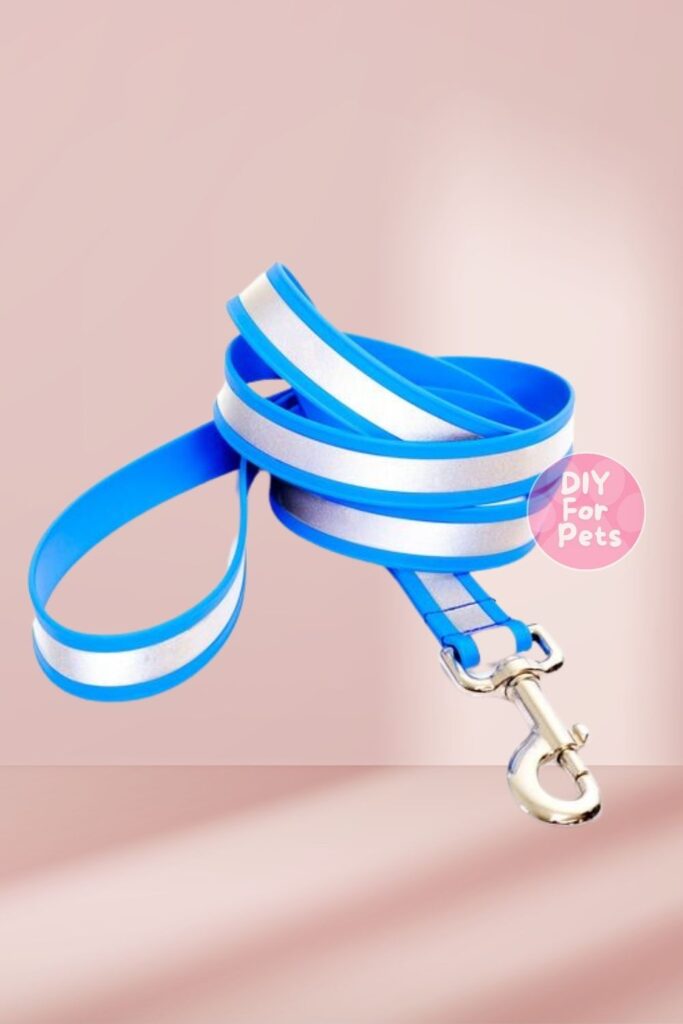
3. Reflective Nylon Leash
Safety is always a priority when walking your dog at night, and a reflective leash can help ensure you’re visible to cars and cyclists. You can use regular nylon webbing and attach reflective tape along the length of the leash. Alternatively, you can find reflective webbing that’s ready to use. Either way, this leash provides peace of mind during evening walks.
This project costs around $8–$12, depending on whether you’re adding reflective tape or using reflective webbing from the start.
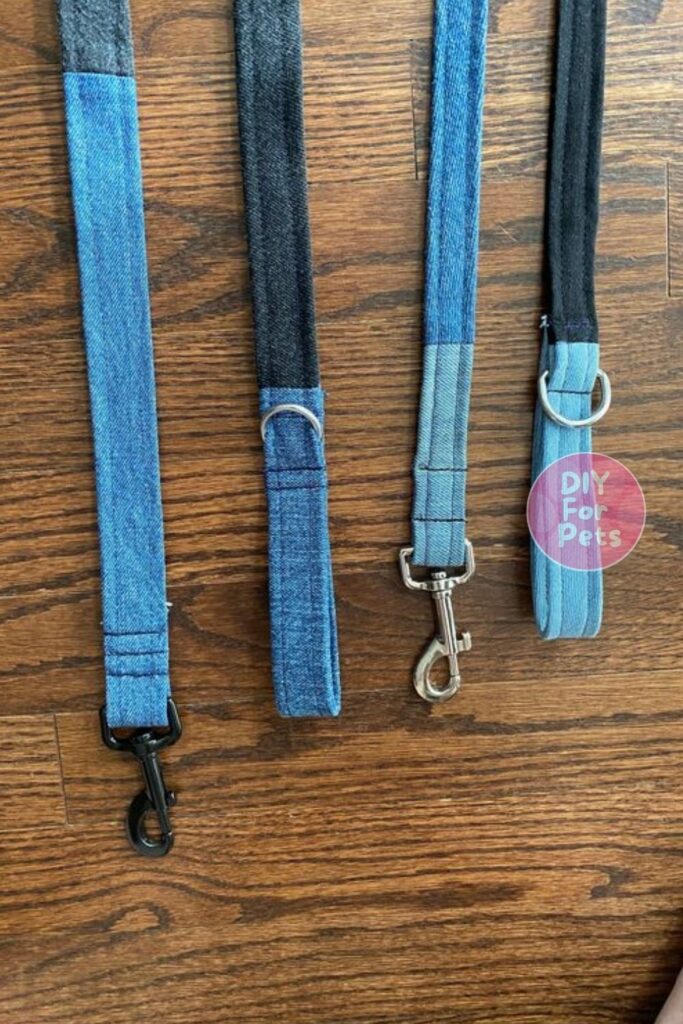
4. Upcycled Fabric Leash
For a more eco-friendly option, consider upcycling old fabric—like denim, canvas, or even an old scarf—into a unique dog leash. Simply cut the fabric into long strips, braid or fold it for strength, and sew the edges securely. Add a clip at one end, and you’ve got a one-of-a-kind leash with a personal touch.
The cost of this leash can be as low as $3–$5 if you’re using materials you already have at home. It’s a great way to repurpose old clothes or fabrics you no longer need.
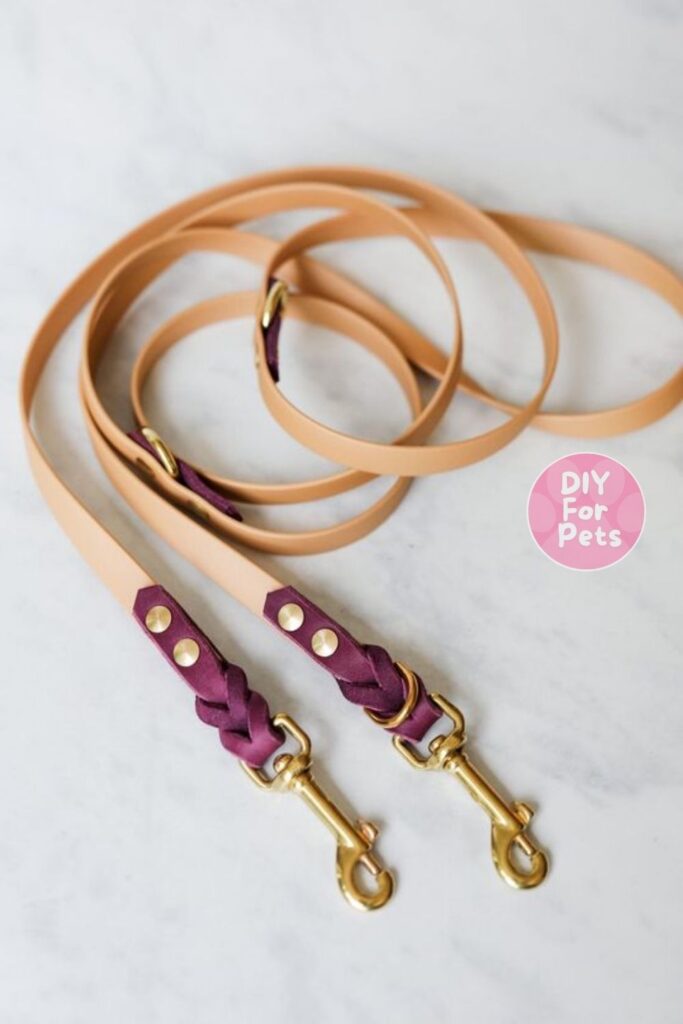
5. Leather Leash
If you’re after something classic and elegant, a leather leash is a timeless choice. You can find leather strips at craft stores, and with a few basic tools (like a hole punch and rivets), you can create a sleek, durable leash that only gets better with age. Attach a swivel clip at one end and secure the handle with a rivet for a polished finish.
This project may cost a bit more—around $15–$20—but the result is a beautiful, long-lasting leash that feels luxurious.
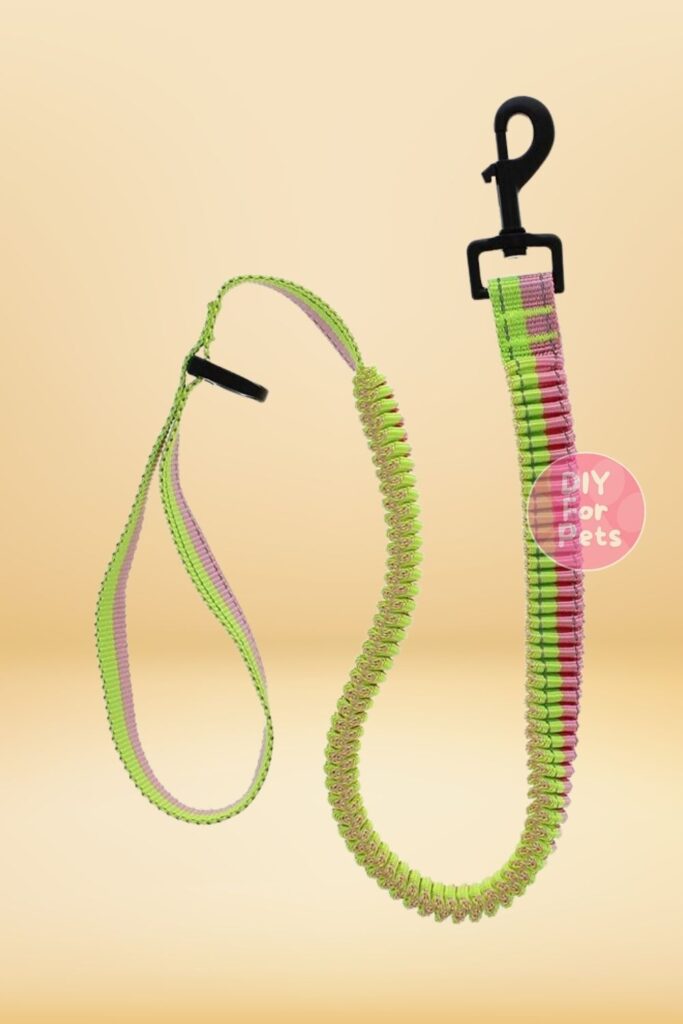
6. Bungee Cord Leash
For active dogs who love to pull, a bungee cord leash can provide extra flexibility and shock absorption during walks. You can combine regular nylon webbing with a section of bungee cord in the middle to create a leash that stretches and contracts. This reduces strain on both you and your dog during sudden pulls or lunges.
This leash is perfect for energetic dogs and costs about $12–$15, making it an affordable and practical option for high-energy pups.
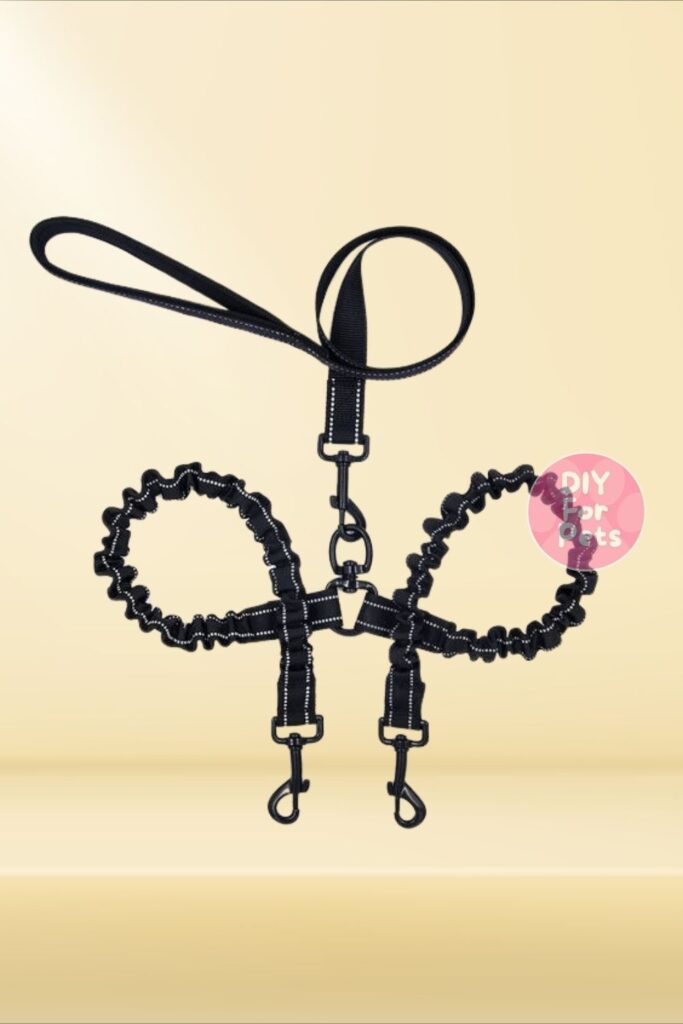
7. Two-Dog Split Leash
If you have more than one dog and want to make your walks more manageable, a DIY split leash is a great solution. Start with a single handle and clip, then attach two shorter leashes that branch off at the end. This way, you can walk two dogs at once with just one leash.
This split leash costs around $15 and is ideal for dog owners who need a bit more control on multi-dog walks.
8. Decorative Ribbon Leash
Add a pop of color and style to your dog’s leash with decorative ribbons. Start with a basic nylon leash, and sew or glue ribbon along the length for a personalized touch. You can choose from floral patterns, stripes, or even holiday-themed designs to suit your dog’s personality.
This leash is fun and inexpensive, costing around $7–$10, and it’s a great way to turn a plain leash into something special.
Dog Leash Basics: Dos & Don’ts
- Do: Choose materials that are strong enough for your dog’s size and weight. Lightweight materials work for small dogs, but large dogs need something sturdier, like paracord or leather.
- Do: Reinforce key areas, like where the clip attaches and the handle loop, to ensure the leash is durable and secure.
- Don’t: Use flimsy or weak materials that could snap under pressure.
- Do: Check the leash regularly for wear and tear, especially if you have a strong or energetic dog who pulls.
- Don’t: Forget to add a comfortable handle, especially for longer walks—your hands will thank you!
FAQs
1. Can I make a leash for a large dog using these ideas?
Yes! For larger dogs, just make sure to use durable materials like thicker rope, paracord, or leather. Reinforce the areas where the leash attaches to the clip and the handle to ensure it’s strong enough to withstand pulling.
2. How long should my DIY dog leash be?
Most standard leashes are around 5–6 feet long, which gives your dog enough freedom to explore while still allowing you to maintain control. You can adjust the length based on your walking style and your dog’s behavior.
3. Are DIY leashes as strong as store-bought ones?
Yes, DIY leashes can be just as strong, if not stronger, than store-bought options, depending on the materials used. Just be sure to reinforce key areas and choose materials suited for your dog’s size and strength.
4. How do I care for a DIY dog leash?
It depends on the material. Nylon and paracord leashes can usually be hand-washed with mild soap, while leather leashes may need to be conditioned with a leather balm to keep them soft and durable.