9 DIY Dog Cone Under $10 (Quick & Easy)
As someone with a house full of pets, including dogs, cats, and rabbits, I’m always on the lookout for ways to make life easier for them—and for me! Recently, one of my dogs needed to wear a cone after a minor surgery. While the traditional plastic cone worked, it wasn’t the most comfortable for my dog. That’s when I decided to create my own DIY dog cone. Not only is it a fun, creative project, but it also allows me to customize the cone to be softer and more comfortable for my dog.
If you’ve ever had to deal with those cumbersome plastic cones and want a budget-friendly and comfortable alternative, join me as we explore some easy DIY dog cone ideas. These options are simple, fun, and effective, ensuring your dog stays comfortable while healing.
DIY Dog Cone: Step by Step
Materials Needed
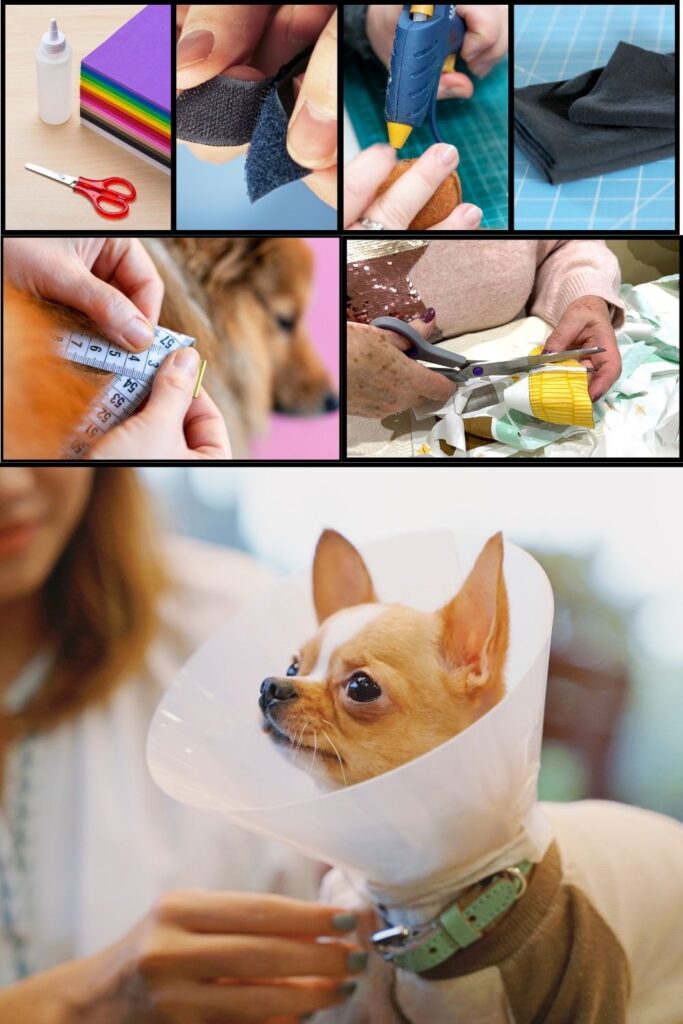
Before we get started, let’s gather some basic materials. Most of these can be found around the house or at a craft store, and they are much softer and more flexible than traditional cones.
- Soft foam sheets or thick felt fabric: $5–$10
- Velcro strips or adjustable snaps: $2–$5
- Scissors: Already have these!
- Measuring tape or ruler: Already have these!
- Hot glue gun or fabric glue: $5–$10
- Old T-shirt, towels, or other soft materials: Free if you repurpose these!
In total, the cost for each project can range from $10 to $20, depending on the materials you use. Let’s move on to how to measure and assemble a comfortable DIY cone for your dog.
Phase 1: Measuring Your Dog’s Neck and Head
The first step in making any DIY dog cone is to measure your dog’s neck and head to ensure the cone will fit comfortably. Use a soft measuring tape to measure around the base of your dog’s neck, where the collar sits. Then measure from the neck to the tip of your dog’s nose. This will give you the right size for the cone’s diameter and height.
Phase 2: Cutting and Shaping the Material
Using the measurements, cut your foam sheets or felt fabric into a large circular shape. The outer diameter should match the measurement from the neck to the nose, while the inner circle should fit snugly around your dog’s neck. If you’re using fabric or foam, you can make a simple cone shape by cutting a wedge and rolling it into a cone. Use Velcro strips or snaps along the edge to hold the cone together.
Phase 3: Decorating and Adjusting for Comfort
To ensure comfort, you can add extra padding by lining the edges of the cone with soft materials, like old T-shirt fabric or towels. This prevents the cone from rubbing against your dog’s skin. You can also decorate the cone with fun patterns or colors, making it feel less like a medical device and more like a cute accessory!
4 Easy DIY Dog Cone Ideas
Now that you have the basic steps down, let’s dive into some creative and budget-friendly ideas for making a DIY dog cone that’s functional and comfortable.
1. Foam Sheet Cone
Foam sheets are soft, lightweight, and perfect for creating a flexible dog cone. To start, purchase a few soft foam sheets (you can find them in craft stores or online for around $5). Cut the foam into a large circle, making sure the diameter matches your dog’s neck-to-nose measurement. Cut out the center circle for your dog’s neck. You can also adjust the thickness by layering the foam sheets if needed.
Once you have the basic shape, roll the foam into a cone and secure the edges using Velcro strips or adjustable snaps. The foam’s flexibility ensures your dog can still eat, drink, and move around without feeling too restricted. This cone is especially useful for smaller dogs who may find traditional plastic cones too heavy or uncomfortable. The total cost for this project is around $10, and it’s a great alternative to stiff plastic cones.

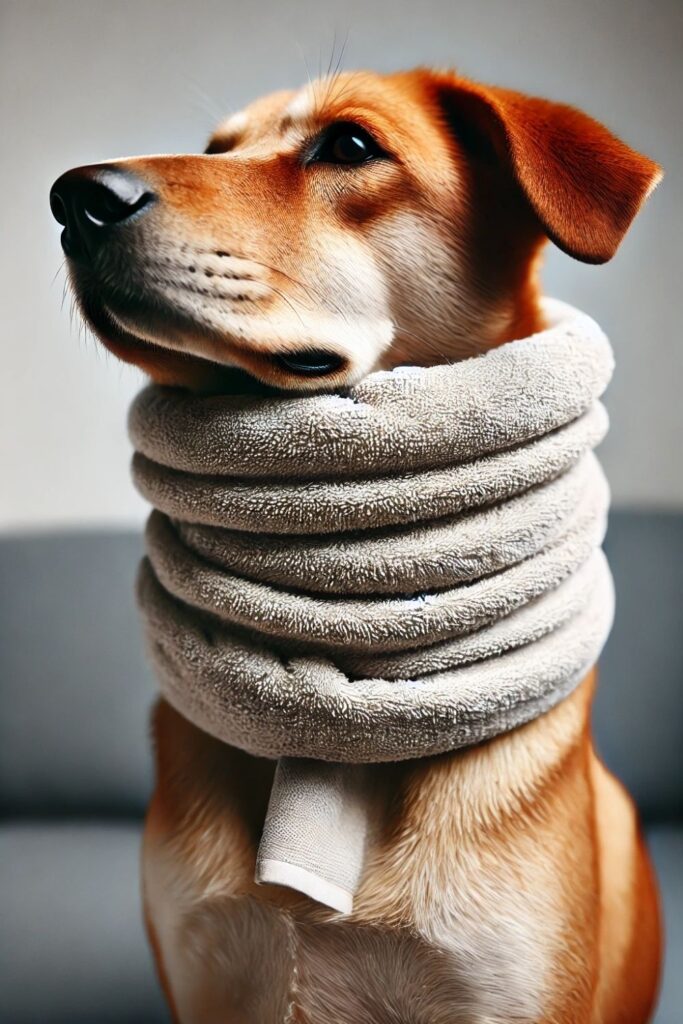
2. Towel Cone
If you’re in a pinch and need a quick solution, a towel cone is one of the easiest and most affordable options. Grab an old towel and fold it into a long strip, making sure the width matches the measurement from your dog’s neck to its nose. Roll the towel into a loose cone shape, wrapping it around your dog’s neck. Secure the ends with Velcro or by tying the towel into place.
This DIY cone is not only super soft but also provides good protection against your dog licking or scratching wounds. You can even double up towels for added thickness. It’s an excellent solution for dogs who dislike hard cones and need something more comfortable for short-term use. The best part? It costs nothing if you’re repurposing an old towel!
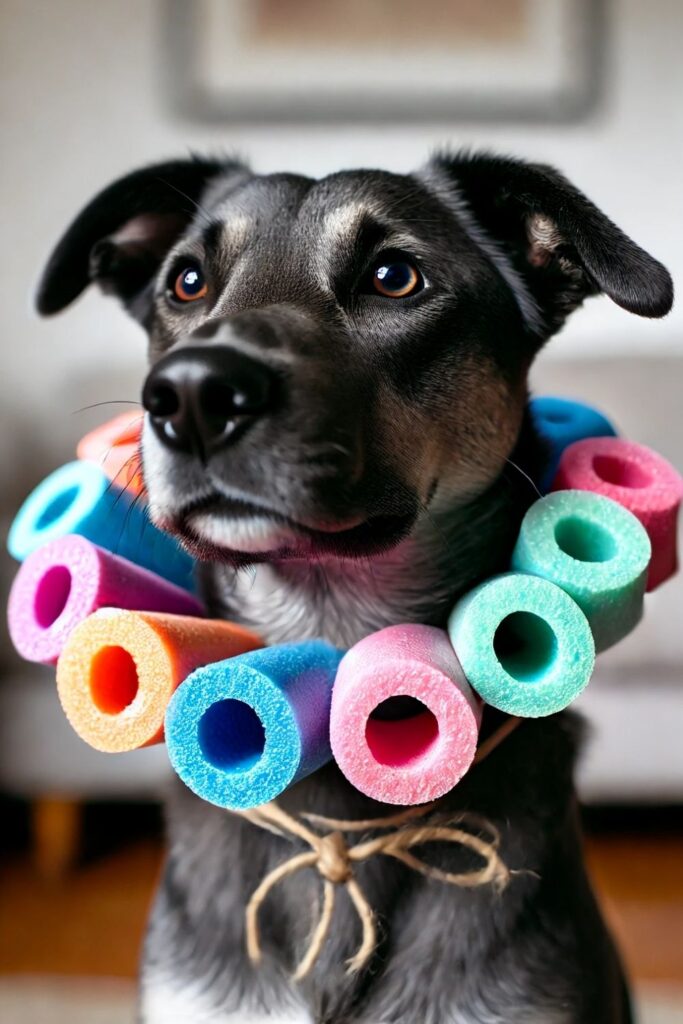
3. Pool Noodle Cone
For a lightweight and affordable option, consider making a cone from a pool noodle! You can find pool noodles at most dollar stores for just a couple of dollars. Cut the noodle into small sections, making sure each piece is about 4 to 6 inches long. Thread a string or shoelace through the center of each noodle section and tie it around your dog’s neck like a collar.
The noodle pieces act as a barrier, preventing your dog from reaching its wounds, while still allowing for plenty of movement and comfort. This idea is ideal for dogs who are highly active, as the cone won’t weigh them down or make them feel trapped. Plus, pool noodles are incredibly durable and waterproof, making this a long-lasting solution. The total cost is around $5–$7.
4. Soft Fabric Cone
For the ultimate comfort, you can create a fabric cone using soft felt or old clothing. To start, cut out a large circular piece of fabric, just like in the foam sheet method. Cut the inner circle to fit your dog’s neck and the outer circle to match the nose-to-neck measurement. Use fabric glue or a hot glue gun to attach soft padding around the edges, ensuring the cone doesn’t rub uncomfortably.
You can also add adjustable straps or Velcro along the sides to make the cone easy to take on and off. This soft fabric cone is ideal for sensitive dogs who dislike stiff or rigid cones. The fabric allows them to move freely without irritation, and it can be easily cleaned or washed if needed. The cost is around $12 to $15, depending on the materials you use.


FAQs
1. How do I know if the DIY cone fits my dog properly?
The cone should fit snugly around your dog’s neck but not too tight. You should be able to fit two fingers comfortably between the cone and your dog’s neck. The length of the cone should extend past your dog’s nose to prevent them from licking or biting their wounds.
2. Can I leave my dog unsupervised with a DIY cone?
While most DIY cones are designed for comfort, it’s best to monitor your dog, especially during the first few hours of wearing the cone. Make sure the cone stays securely in place and doesn’t cause any discomfort. Over time, you’ll be able to gauge whether your dog can wear it unsupervised.
3. How long should my dog wear a DIY cone?
The cone should be worn until your dog’s wound or injury has healed or as directed by your veterinarian. Typically, cones are used for one to two weeks after surgery or injury to prevent licking or scratching.
4. Can I customize the design of the DIY cone?
Absolutely! One of the perks of making a DIY dog cone is the ability to personalize it. You can use fun colors, patterns, or even stencil your dog’s name on the cone. Just make sure the decorations don’t interfere with the functionality of the cone.
Creating a DIY dog cone is a fun and easy way to ensure your dog’s recovery is as comfortable as possible. Whether you opt for a foam cone, a simple towel, or a pool noodle design, each of these options is affordable, soft, and highly effective. Plus, by customizing the cone, you can make the experience a little more enjoyable for both you and your dog. So gather your materials, follow the steps, and create a cone that keeps your dog safe and stylish while they heal!