5 DIY Dog Carrier At Less Than $5 (Sturdy, Easy & Quick)
As someone who loves crafting and creating things for my pets, one of the most exciting projects I’ve taken on is making DIY dog carriers. Whether it’s for taking my small dog on errands, hiking with my bigger one, or simply making sure my pets stay safe and comfortable while traveling, a dog carrier is a must-have.
With a little creativity, I realized that making my own dog carrier is not only fun but also a budget-friendly alternative to store-bought carriers. Plus, I get to customize it based on my dog’s size and comfort! So, if you’re like me and love to create practical, fun, and stylish things for your pets, follow along as I walk you through easy DIY dog carrier ideas that you can try at home.
DIY Dog Carrier: Step by Step
Materials Needed
Before we dive into the different ideas, let’s start by gathering some basic materials. These items are affordable and easily found at craft or hardware stores, or you may already have them at home.
- Sturdy fabric (canvas, denim, or cotton): $5–$10 per yard
- Strong thread and a sewing machine (or fabric glue for no-sew options): Already have these!
- Velcro, zippers, or buckles (for securing the carrier): $3–$5
- Foam padding (for added comfort): $3–$7
- Adjustable straps or rope: $3–$5
- Scissors, measuring tape, and pins: Already have these!
The cost of making a DIY dog carrier can range from $10 to $20, depending on the materials you choose, making it a budget-friendly project.
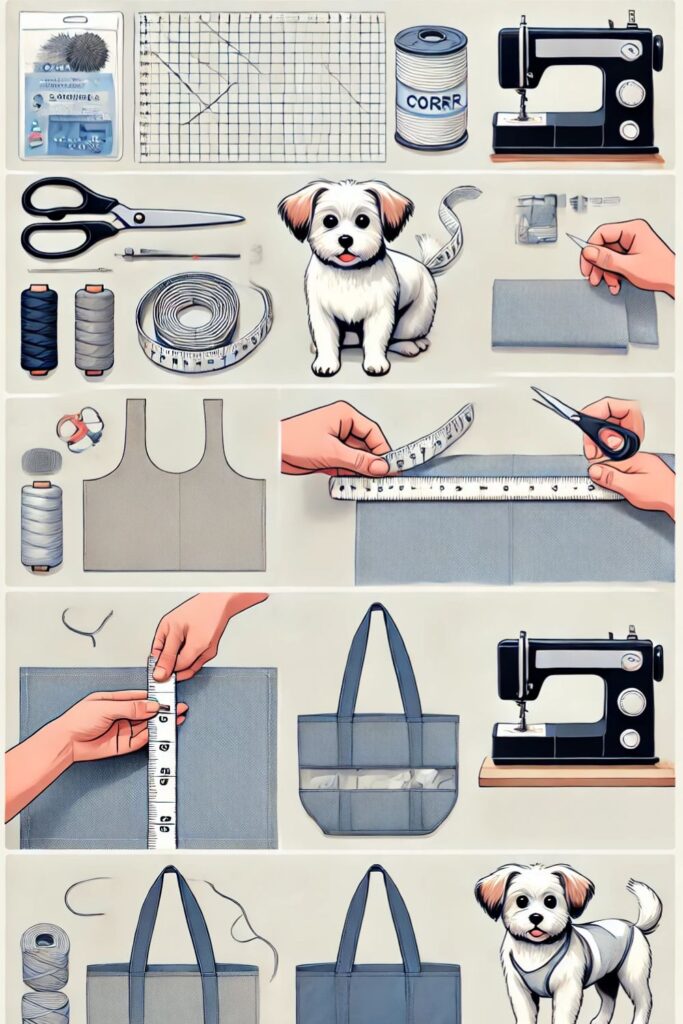
Phase 1: Measuring Your Dog
Before you start cutting fabric, measure your dog to ensure the carrier will be the right size. Use a soft measuring tape to measure your dog’s length (from neck to tail), width, and height. You’ll also want to measure around your dog’s chest to ensure a snug but comfortable fit. These measurements will guide you in cutting the fabric and determining the overall size of the carrier.
Phase 2: Cutting and Sewing the Fabric
Once you have your measurements, cut your fabric to the appropriate size, leaving a few inches extra for seams and adjustments. If you’re adding padding, make sure to cut the foam to fit inside the carrier as well. Sew the pieces together, creating a basic pouch shape with straps for carrying. You can add Velcro or a zipper to make sure your dog stays secure while inside. For added style, you can decorate the outside with fabric paint, stencils, or even add pockets for treats and toys!
4 Easy DIY Dog Carrier Ideas
Now that we’ve gone over the basics, let’s explore some fun, creative, and easy-to-make DIY dog carrier ideas. These carriers are practical, stylish, and a great way to keep your dog close while you’re on the go.
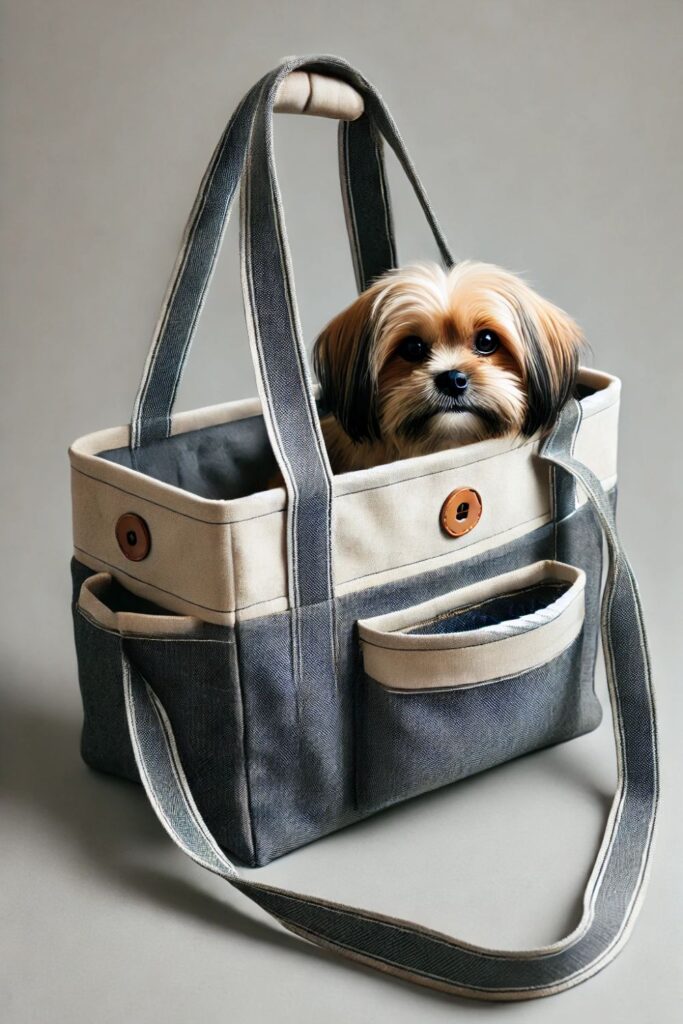
1. Simple Tote-Style Dog Carrier
One of the easiest DIY carriers you can make is a simple tote-style carrier. Start by choosing a sturdy fabric like canvas or denim, as it needs to support your dog’s weight. Cut two large rectangular pieces of fabric for the body of the carrier, ensuring they are large enough to accommodate your dog’s length and width. Sew the pieces together along the sides and bottom, leaving the top open. For added structure, you can insert foam padding between the layers.
Next, attach straps made from strong fabric or rope to each side of the tote. Make sure the straps are long enough to be worn over your shoulder. You can also add a small pocket on the side for storing treats, toys, or even your phone. This carrier is ideal for small dogs, and the total cost for materials is around $10. It’s perfect for quick trips or running errands with your furry friend.
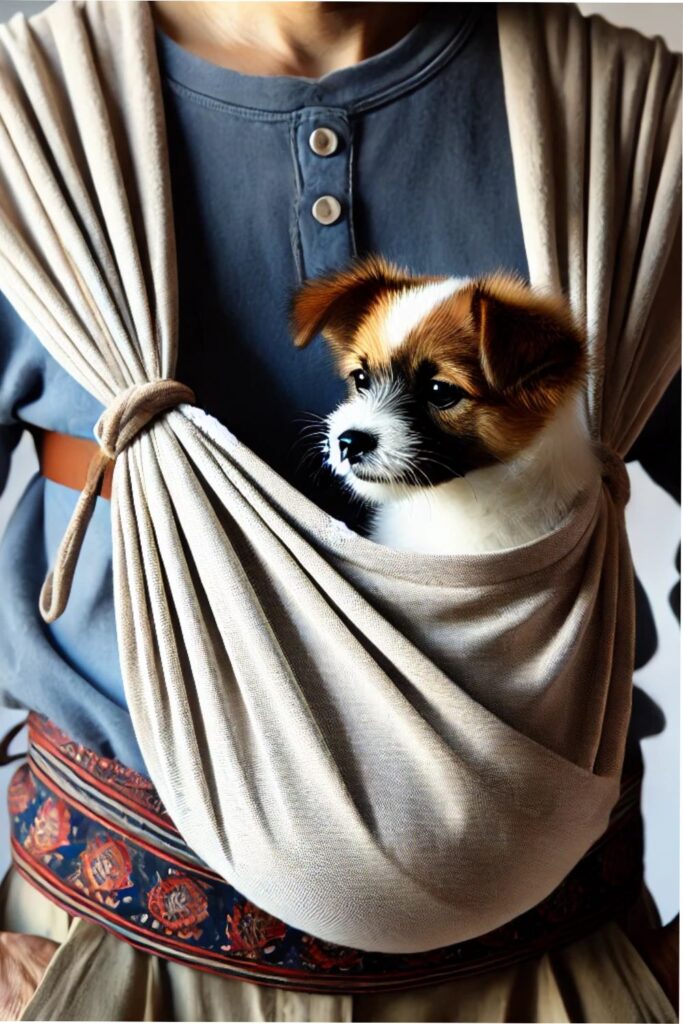
2. No-Sew Dog Sling Carrier
For those who don’t want to sew, a no-sew dog sling carrier is a quick and easy project. All you need is a large piece of soft, breathable fabric like a cotton scarf, shawl, or an old T-shirt. Start by folding the fabric diagonally to create a long triangle, then tie the ends together to form a large loop.
Place the loop over your shoulder, and position the tied end on your hip. The fabric should form a pouch-like cradle, where your dog can comfortably sit. Adjust the size of the loop to ensure a snug fit for your dog. This sling-style carrier is perfect for small dogs and puppies, offering them a secure and cozy space close to your body. The cost for this project is nearly free if you’re using an old scarf or shirt, making it one of the most budget-friendly options!
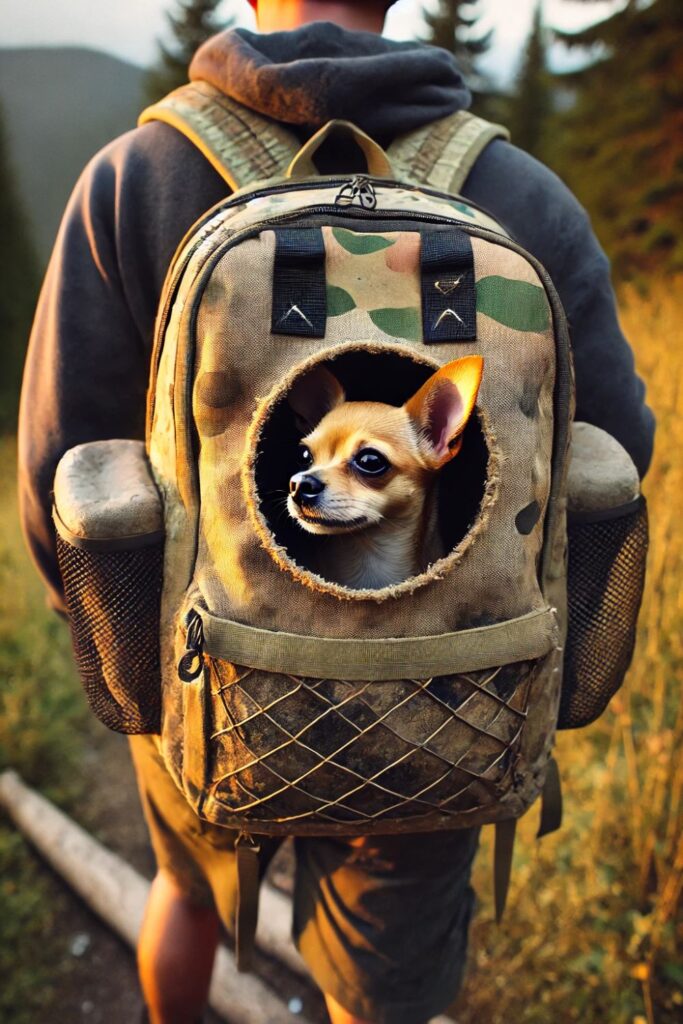
3. Backpack-Style Dog Carrier
If you enjoy hiking or outdoor activities, a backpack-style dog carrier is a fantastic choice. For this project, you’ll need a small backpack (you can repurpose one you already have or purchase a budget-friendly one). Start by cutting a hole in the top of the backpack large enough for your dog’s head to fit through comfortably. Reinforce the edges of the hole with fabric or foam to prevent any discomfort.
To keep your dog secure, sew or attach a small harness inside the backpack that can clip onto your dog’s collar or harness. You can also add foam padding to the bottom of the backpack for extra comfort. This carrier is ideal for small to medium-sized dogs, and it allows you to keep your hands free while on adventures. The cost is around $15–$20, depending on the materials, and it’s a perfect option for active pet owners.
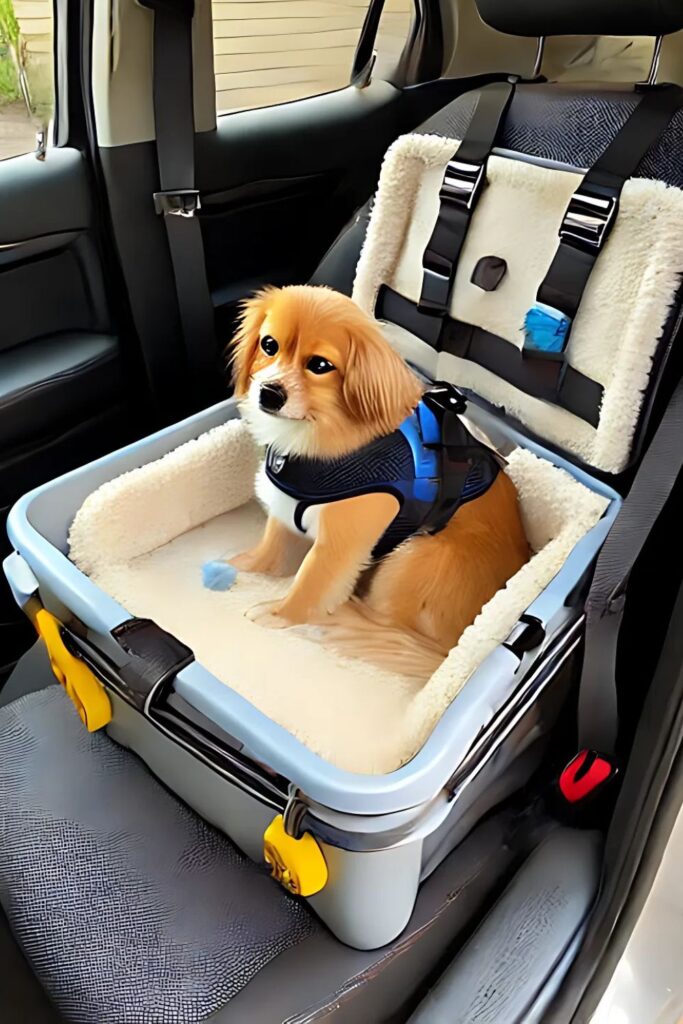
4. Convertible Car Seat Carrier
For those who frequently travel by car, a convertible car seat dog carrier is a great DIY project. This carrier doubles as a car seat, keeping your dog safe and comfortable during car rides. To make it, start by using a sturdy plastic storage bin or a small wooden crate as the base. Line the inside with foam padding or a soft blanket for comfort.
Next, create straps that secure the carrier to your car seat. You can use Velcro or seatbelt loops to attach the carrier to the seat securely. For added safety, sew a small harness clip inside the carrier to keep your dog from jumping out. This carrier can also be used outside the car, making it versatile and functional. The cost for this project is around $20, and it provides peace of mind knowing your dog is safe while traveling.
FAQs
1. How do I know which carrier design is best for my dog?
The best carrier design depends on your dog’s size, weight, and personality. Smaller dogs may be more comfortable in a tote or sling carrier, while active dogs might prefer a backpack-style carrier. Always consider your dog’s comfort and safety when choosing a design.
2. Can I carry my medium-sized or large dog in a DIY carrier?
It’s possible to make a DIY carrier for medium-sized dogs, but you’ll need to use stronger materials like canvas or denim and reinforce the seams. For larger dogs, a carrier may not be practical, but you can create a car seat carrier for traveling.
3. Are DIY dog carriers safe?
Yes, DIY dog carriers can be just as safe as store-bought options as long as they are made with strong, durable materials and provide enough support for your dog. Be sure to test the carrier’s strength and ensure your dog is secure before using it.
4. How do I clean a DIY dog carrier?
Most DIY carriers made from fabric can be spot-cleaned or machine-washed, depending on the materials used. If you’re using foam padding or liners, make sure they are removable and washable. Regular cleaning will help keep the carrier fresh and comfortable for your dog.
Creating a DIY dog carrier is such a rewarding project, allowing you to tailor the design to fit your dog’s needs and your personal style. Whether you opt for a simple tote, a cozy sling, or a functional backpack, these carriers are budget-friendly, easy to make, and offer a personalized touch. Plus, the process is fun and allows you to get creative with fabrics and decorations. So grab your materials and let’s make a custom dog carrier that both you and your furry friend will love!