5 DIY Dog Nail Scratch Board In Less Than $15
As someone who’s always had a house full of pets—dogs, cats, and even rabbits—I’ve learned that keeping them happy and healthy involves a lot of creativity and DIY projects. One of the things that surprised me the most was how useful a DIY dog nail scratch board can be.
If you’ve ever struggled with trimming your dog’s nails (like I have), you know how stressful it can be for both you and your dog. That’s where a nail scratch board comes in handy. It’s a fun and easy way for your dog to file down their own nails without all the anxiety of nail clippers. Plus, it’s a simple project that you can make at home with minimal materials and cost. Let’s explore why dogs need nail scratch boards and how you can create one that suits your furry friend.
Do Dogs Need Nail Scratch Boards?
Yes, they do! Dogs need regular nail maintenance, and if their nails get too long, it can lead to discomfort, pain, and even health issues like joint problems. For many dogs, nail trimming can be a scary experience, especially if they’ve had a bad encounter with clippers in the past. That’s where a nail scratch board comes in as a positive alternative.
A scratch board allows your dog to file down their own nails while playing or following basic commands. It’s less invasive than clipping, and with the right training, your dog can actually enjoy the process. For active dogs that love to dig or scratch, this becomes a fun way to keep their nails in check without the usual drama. Plus, it’s a great bonding activity that helps build trust between you and your dog.
DIY Dog Nail Scratch Board: Step by Step
Making a dog nail scratch board is a breeze, and you don’t need any fancy tools or materials. Here’s how to make your very own, step by step.
Materials Needed
- Piece of plywood or a sturdy wooden board: $5–$10
- Sandpaper (60–80 grit): $3–$5
- Glue or heavy-duty adhesive: $2–$5
- Paint (optional for decoration): $2–$5
- Nail polish or treats for training: Already have this!
Total cost: Around $10–$20, depending on what materials you already have at home.
Phase 1: Choosing the Right Board
Start by selecting a sturdy board that’s the right size for your dog. A piece of plywood works perfectly because it’s durable but lightweight. You’ll want the board to be large enough for your dog to scratch on comfortably but not so big that it’s hard to store.
Phase 2: Attaching the Sandpaper
Once you have your board, cut your sandpaper to match the size of the board. Use a heavy-duty adhesive or glue to attach the sandpaper to the board securely. Make sure the sandpaper covers the entire surface where your dog will scratch. If you want the board to last longer, you can layer two pieces of sandpaper for added durability.
Phase 3: Decorating the Board (Optional)
If you’re feeling creative, now’s the time to decorate the board! You can paint the sides or add your dog’s name for a personalized touch. Just make sure the paint is pet-safe and fully dry before introducing the board to your dog.
Phase 4: Training Your Dog to Use the Board
Now comes the fun part—training your dog to use the scratch board! Start by applying a small amount of nail polish or a treat like peanut butter to the top of the board to encourage your dog to scratch. You can also use a verbal cue like “scratch” to help your dog associate the action with the board. With a little patience, your dog will soon understand that using the scratch board is both fun and rewarding.
Easy DIY Dog Nail Scratch Board Ideas
Here are four simple but creative DIY dog nail scratch board ideas that you can try at home. Each one is budget-friendly and customizable to suit your dog’s needs.
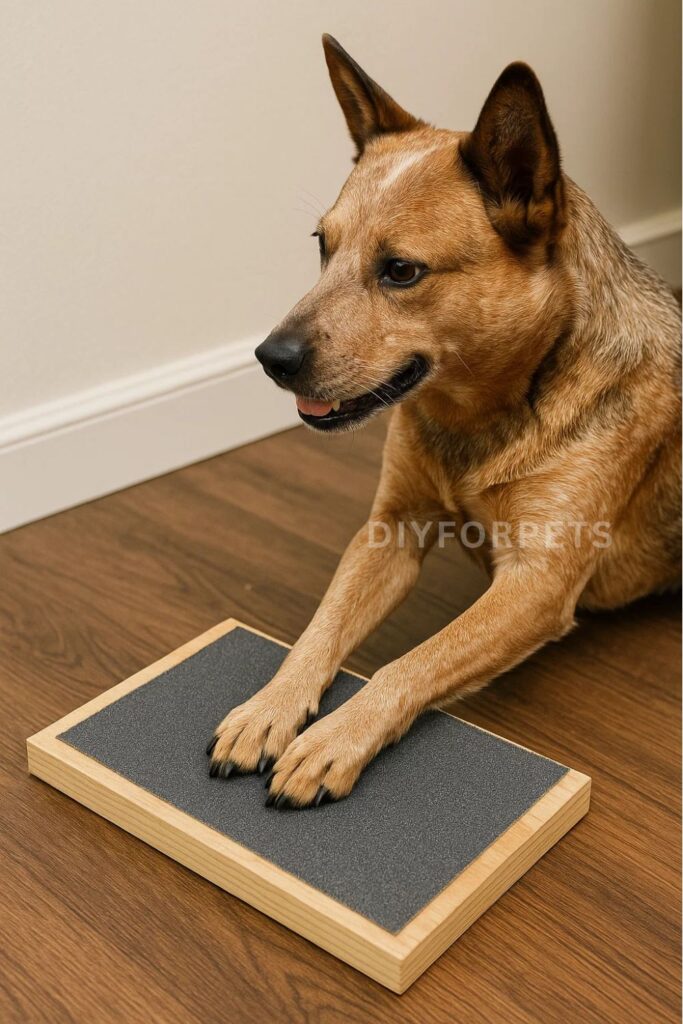
1. Basic Sandpaper Board
The simplest and most straightforward option is to create a basic sandpaper scratch board. Using a piece of plywood and attaching a sheet of 60–80 grit sandpaper, this board gives your dog a reliable surface to file their nails. It’s perfect for dogs who are just starting out with nail scratch boards and need something easy to use.
This option costs about $10 and takes only a few minutes to put together.
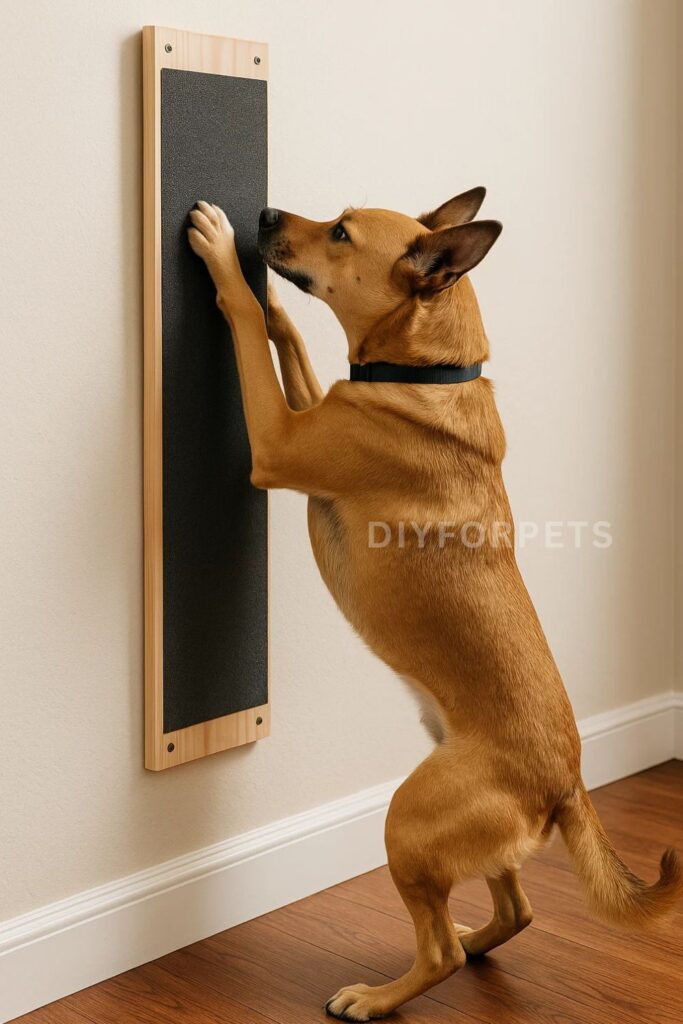
2. Vertical Wall-Mounted Scratch Board
If your dog prefers to stand up or jump while scratching, a vertical scratch board might be a great option. Simply mount a sandpaper-covered board onto a wall at a height that matches your dog’s natural scratching position. This version is ideal for active dogs who enjoy standing up and engaging their entire body while scratching.
This project costs around $15 and is a fun way to incorporate the board into your home’s layout.
3. Textured Multi-Surface Board
For dogs that love variety, you can create a multi-surface scratch board with different textures. Use plywood as the base, but instead of covering it all with sandpaper, try using different materials like rubber matting or carpet on sections of the board. This gives your dog different surfaces to scratch on, which can keep them entertained and engaged for longer.
This project costs around $20 and provides more enrichment for dogs who get bored easily.
4. Portable Scratch Board
If you want a board that’s easy to move around or take with you to the park, consider making a smaller, portable version. Use a lightweight piece of wood and attach sandpaper or textured rubber to it. The board should be small enough to fit in your car or backpack but still large enough for your dog to scratch comfortably. This is great for training on the go or outdoor activities.
This option costs about $10 and is ideal for those who need a scratch board that can travel.
Dos & Don’ts in Dog Nail Filing
- Do: Introduce the scratch board slowly and reward your dog with treats or praise when they use it.
- Do: Use coarse sandpaper (60–80 grit) for the best nail-filing effect, but monitor it to make sure it doesn’t wear down too quickly.
- Don’t: Force your dog to use the scratch board. If they seem unsure, take it slow and encourage them with positive reinforcement.
- Do: Check your dog’s nails regularly to make sure they’re not filing them down too much.
- Don’t: Use the scratch board as a substitute for regular nail care. It’s a helpful tool, but you should still check your dog’s nails for length and health regularly.
FAQs
1. Can all dogs use a scratch board?
Yes, most dogs can use a scratch board, but some dogs may need more training to get comfortable with it. Start slowly and always supervise the process to ensure your dog is using the board safely.
2. How often should I use the scratch board with my dog?
This depends on your dog’s activity level and how quickly their nails grow. Some dogs may need to use the scratch board once or twice a week, while others may benefit from daily use.
3. Is a scratch board a good alternative to nail clippers?
A scratch board can be a great supplement to nail clippers, especially for dogs who are anxious about having their nails trimmed. However, it shouldn’t replace regular nail care entirely, as you’ll still need to check your dog’s nails to make sure they’re not too long.
4. What should I do if my dog doesn’t like the scratch board?
Be patient! Some dogs need time to get used to the idea. Use treats, positive reinforcement, and verbal cues to encourage them. If your dog still isn’t interested, try making the board more enticing by using different materials or adding their favorite scents.
Creating a DIY dog nail scratch board is not only an easy and budget-friendly project, but it’s also a fantastic way to help your dog with their nail care in a fun, stress-free way. Whether you choose a basic sandpaper board or get creative with different textures and designs, your dog will appreciate the opportunity to manage their nails naturally. So grab some materials, get building, and watch your dog enjoy their new scratch board!